Learn Rough Sketching of Figures
I wanted step-by-step instructions for how to learn to draw or draw better. I wanted to start with the basics quite quickly and the aim is just be good at rough or very rough sketching for figures of people.
Goal
Reach fast, readable figure sketching suitable for diagrams and explanation: clear pose, balance, and action—no anatomy detail.


Core principle
Draw action → structure → indication (never details). If the pose reads at stick-figure level, it will read when refined.
Tools and cadence
- Pen or single digital brush; no erasing.
- 15–25 min/day.
- Draw figures 10–15 cm tall (too small kills structure).
Week 1: Gesture (the fastest payoff)
Daily (10–15 min)
- Line of action: one sweeping curve for spine/energy.
- Add head as an oval; pelvis as a tilted wedge.
- Indicate limbs with single lines (shoulder→elbow→wrist; hip→knee→ankle).
- Stop. 30–60 seconds per pose; do 15–25 poses.
Success criterion: you can tell what the person is doing at a glance.


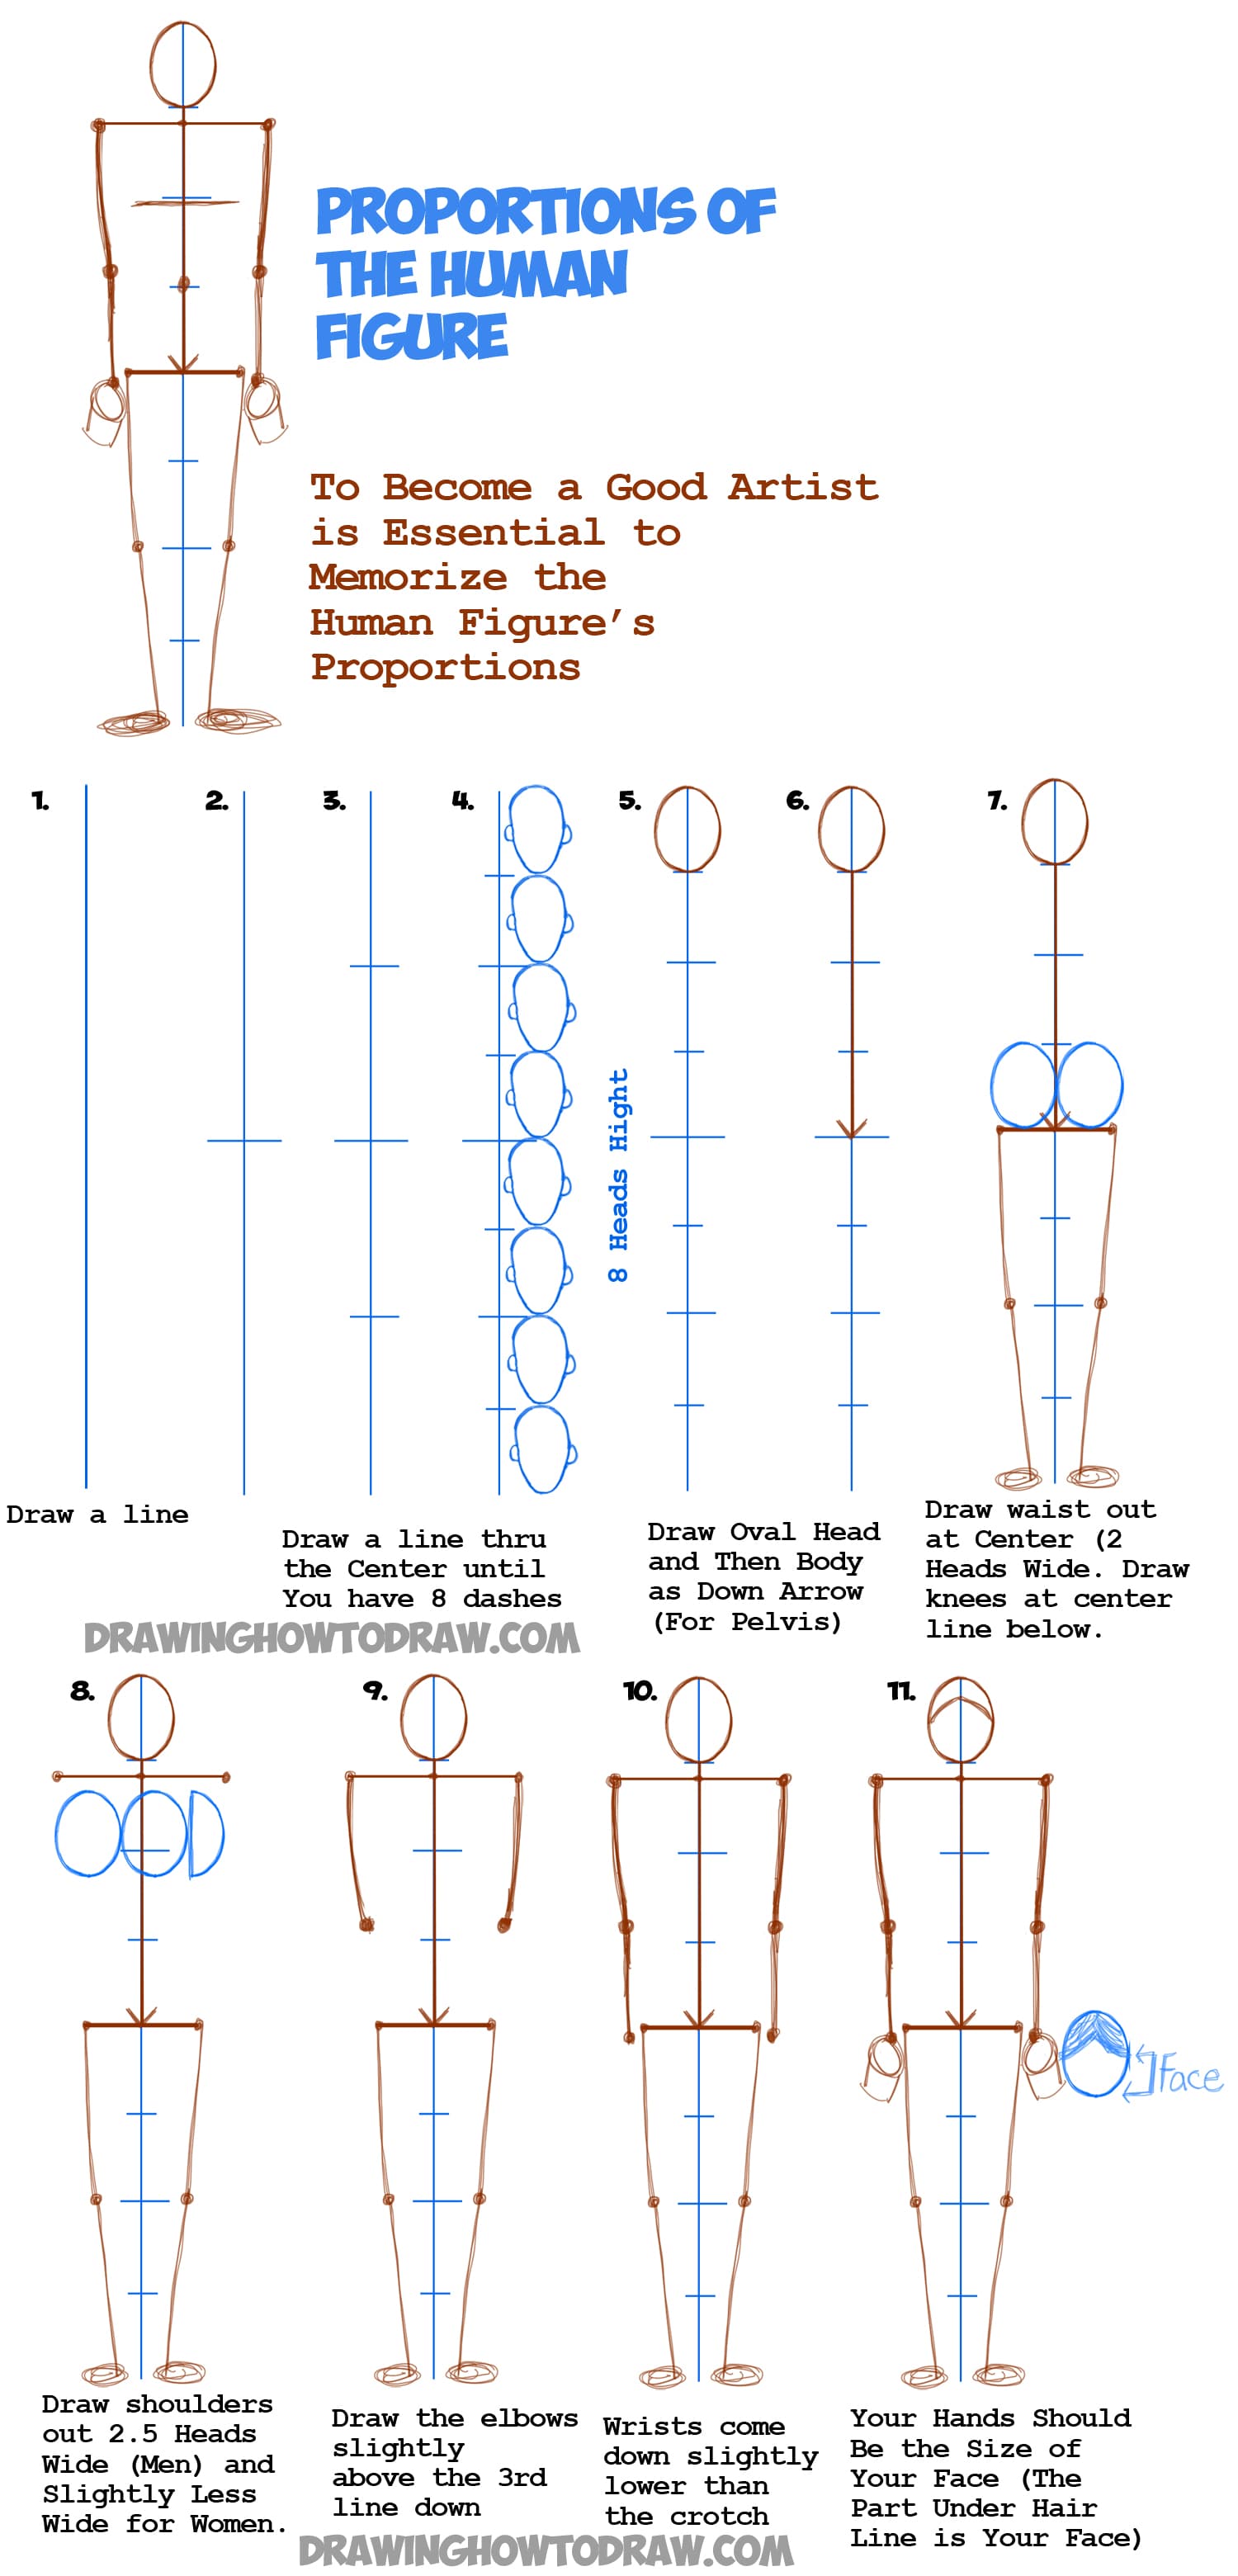
Week 2: Proportions you actually need
Daily (15–20 min)
- Use an 8-head rule loosely: head, ribcage (2), pelvis (1), legs (4).
- Block torso as two boxes (ribcage + pelvis) with a twist between them.
- Place joints early (shoulder/hip/knee) before drawing limbs.
Drill: draw 10 standing figures; exaggerate hip/shoulder tilt so balance reads.


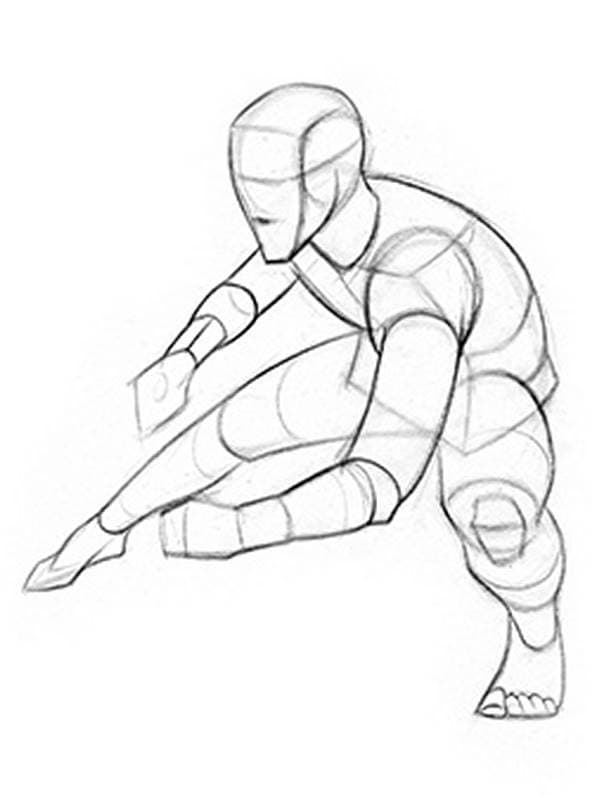
Week 3: Mannequinization (volume without anatomy)
Daily (15–20 min)
- Limbs as cylinders; hands/feet as simple wedges.
- Keep overlaps clear (which form is in front).
- One contour pass only; no shading.
Drill: draw the same pose twice—first as stick, second as mannequin.

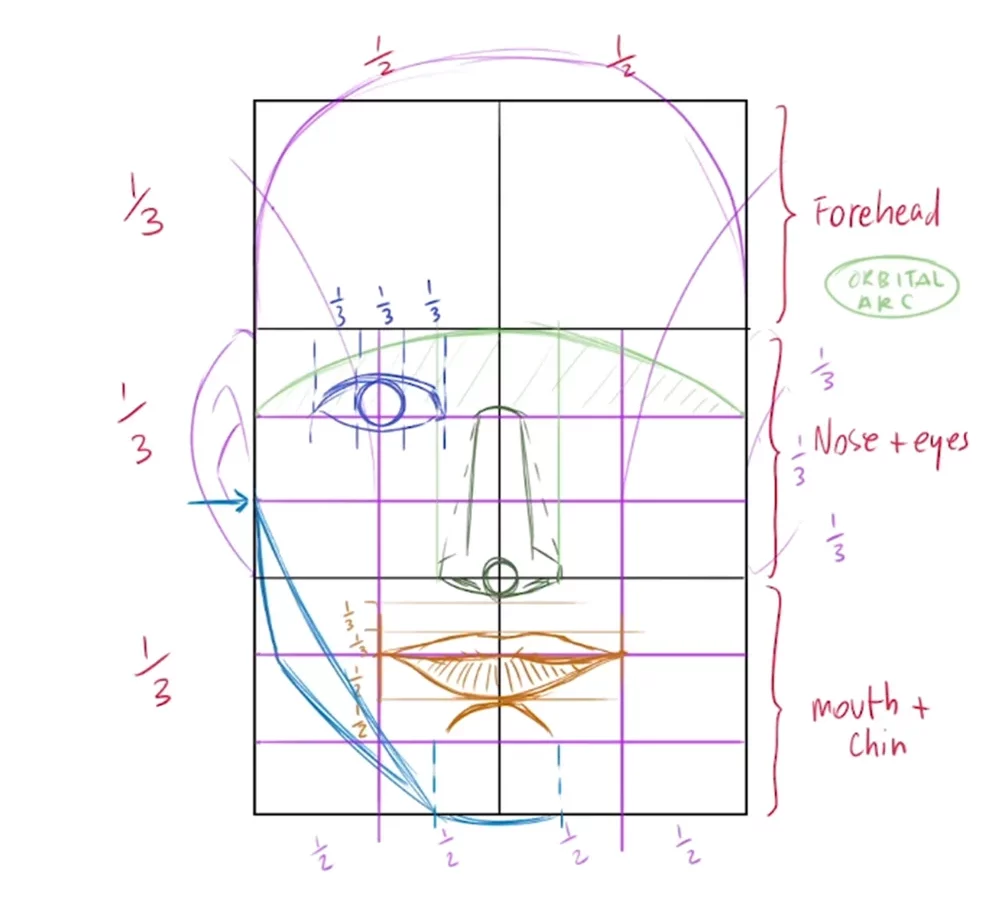
Week 4: Faces, hands, and simplification
Daily (20–25 min)
- Heads: sphere + jaw; eye line halfway; nose halfway to chin.
- Hands: mitten → split into thumb + block; fingers as one unit.
- Clothing: indicate with 2–3 folds that follow action, not detail.


Five rules for diagram-grade figures
- Exaggerate action slightly; neutrality reads dead.
- Show weight: drop a vertical from head—does it land over the foot?
- Overlap beats outline; avoid tracing the silhouette twice.
- Limit detail to one cue (e.g., a collar or shoe angle).
- Label if needed; clarity > realism.


7-minute drill (daily fallback)
- 3 min: six 30-second gestures.
- 2 min: two mannequins.
- 2 min: one figure with labels (role/action).


What to avoid early
- Copying photos slowly.
- Muscle anatomy.
- Shading.
- Tiny sketches.